Bus Simulator Ultimate Customization Guide: Skins, Upgrades and Everything In Between (2026)
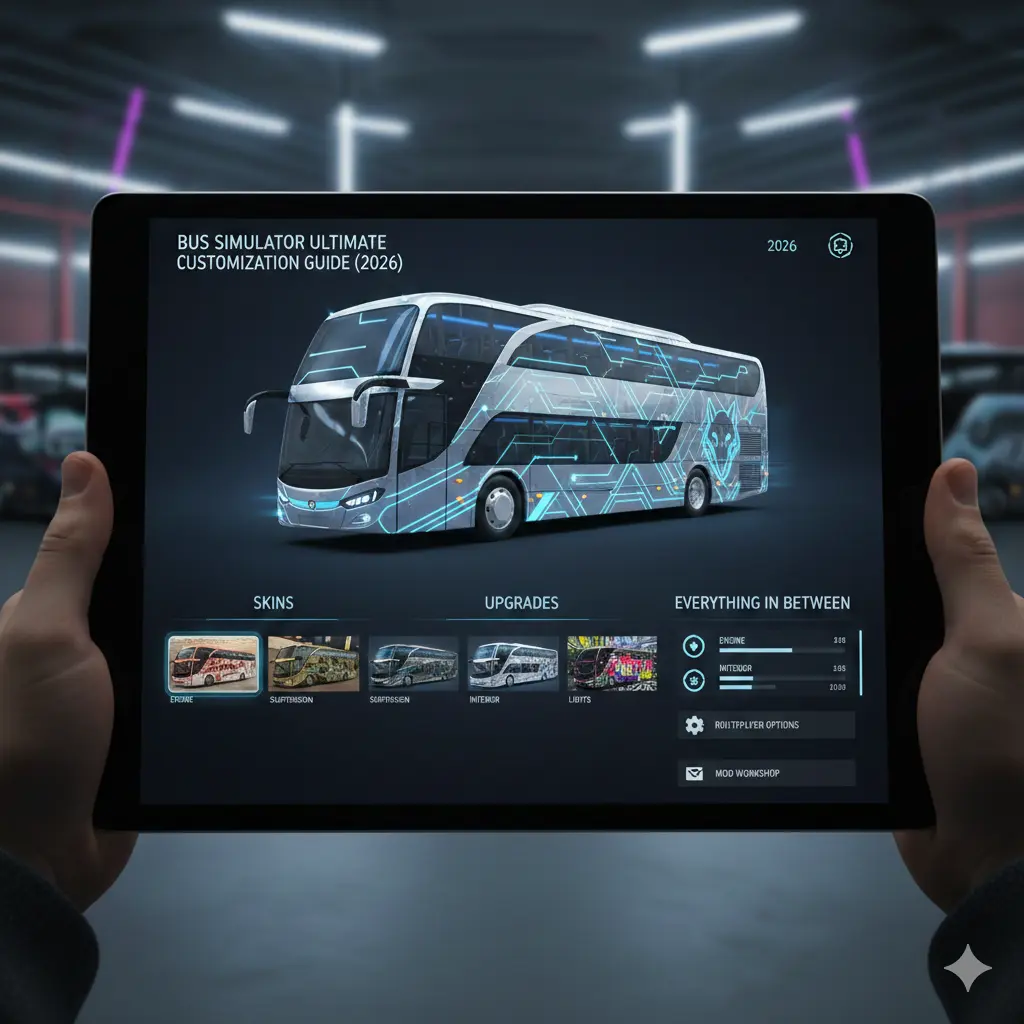
I spent 45 minutes designing a livery for my Setra S 431 DT that I genuinely never showed anyone.
Deep red base coat. White diagonal stripe across the body. Company logo I’d designed myself from scratch using the in-game tools. I drove the San Francisco to New York route three times just to see the livery from the exterior camera angle in different lighting conditions — morning sun, overcast midday, and then the genuinely beautiful night city lighting as I pulled into New York. Nobody else saw any of it. It was entirely for me. And that’s the thing about Bus Simulator Ultimate’s customization system that most guides completely miss: it goes far deeper than slapping a skin on a bus and calling it done.

Here’s the part that might surprise you: customization in this game isn’t just cosmetic. Some upgrades directly affect passenger satisfaction, fuel efficiency, and your bottom line. Installing Wi-Fi generates a satisfaction bonus. Upgrading your braking system reduces damage penalties. Adding air conditioning affects how passengers rate comfort on long routes. The line between “making your bus look good” and “making your bus earn more” is blurrier than any guide I’ve read acknowledges.
This guide covers every customization option in the game — free and paid skins, where to find them, how to install them correctly, performance upgrades that actually matter, interior options that boost satisfaction scores, livery design that stands out in multiplayer, and the Michelin tires feature that most players unlock without fully understanding what it does. All of it confirmed against the current v2.2.8 version.
How Do You Customize Buses in Bus Simulator Ultimate?
Everything customization-related lives in the Garage. From the main menu, tap Garage, select the bus you want to modify, and you’ll find three main tabs: Exterior, Interior, and Upgrades. Most players spend all their time in Exterior and ignore the other two entirely. That’s a mistake — especially the Upgrades tab, which we’ll come back to shortly.
The Exterior Tab: Paint, Skins, and Plates
The Exterior tab gives you three layers of visual customisation. First: paint. A full colour picker with hundreds of shades, applied as a solid base coat to the entire bus body. Simple, quick, and the fastest way to distinguish your fleet from default silver-grey. Second: skins. Pre-designed livery patterns that wrap the full bus exterior in one tap. Some are unlocked free from the start. The premium ones — including officially licensed designs — cost gold coins or real money through the DLC store. Third: wheel plates. Subtle design variations on the wheel covers. Not dramatic, but they add a personalised detail that shows on exterior camera during driving.
Here’s what the AppGamer guide on customisation confirms that most players miss: different vehicle types have different available skin choices. A skin designed for the Mercedes-Benz Travego won’t appear as an option for the Neoplan Skyliner. Always check skin compatibility before purchasing a DLC pack — the store doesn’t always make this obvious upfront.
The Interior Tab: More Than Just Decoration
The Interior tab lets you change seat upholstery colour and pattern, dashboard layout position (left or right — useful for international routes with different driver positions), and the visual style of interior fittings. Again — most players skip this entirely. The interior is only visible when you’re driving in the first-person cockpit view, which some players never use. But if you enjoy the immersive cockpit perspective, interior customisation transforms how personal the bus feels. Pair a dark leather upholstery with a red exterior paint and the combination in cockpit view looks genuinely striking.
What’s Free vs What Costs Money in Customization?
This is where I need to be completely honest with you, because the game’s free-versus-paid line is not where most players assume.
| Customization Type | Cost | Notes |
|---|---|---|
| Solid paint colours | Free (coins) | Small coin cost, all colours available |
| Default skins (basic liveries) | Free | Limited selection, unlocked from start |
| Premium DLC skins | Gold coins / real money | Licensed designs, bus-specific |
| Community skins (external) | Free | From bussimulatorultimate.com, requires install |
| Wheel plates | Free (coins) | Minor visual only |
| Interior seat/dash changes | Free (coins) | Visible in cockpit view only |
| Custom plates | Free (coins) | Personal touch, visible in exterior close-up |
| Performance upgrades | Coins (earnable) | Engine, tires, braking, GPS — all in-game currency |
| Passenger amenities | Coins (earnable) | Wi-Fi, AC, WC, entertainment — satisfaction impact |
The important takeaway: everything that actually affects gameplay — performance upgrades and passenger amenities — costs only in-game coins, not real money. The real money is reserved for cosmetic DLC skins. Which means you can build a fully optimised, high-performing, passenger-satisfying bus without spending a single real penny. The premium skins look great. But they don’t make your bus earn more. The money guide breaks down exactly how to earn coins fast enough to afford every upgrade without grinding for weeks.
Where Do You Find the Best Custom Skins?
Here’s what most guides won’t tell you about skin sources: the in-game DLC store is not where the best skins live. The community skin scene is far richer, more creative, and completely free. Three sources worth knowing:
https://getbusimultimateapk.com/ (Official Community Hub)
Zuuks Games runs an official community skin-sharing site at bussimulatorultimate.com. Players upload their custom designs here, which means you can browse thousands of liveries — realistic national bus company designs, sports team wraps, country flag themes, fantasy designs, regional bus operator skins from Brazil, Philippines, Turkey, India, and more. The site has direct URL-based skin loading: you copy the skin URL, paste it into the in-game skin import field in the Garage, and the skin loads directly without any file manager work. This is the easiest installation method and the one Zuuks officially supports.
Skin Bus App (Google Play)
The “Skin Bus Simulator Ultimate” app on Google Play is a third-party library with hundreds of community-created skins organised by bus model, country theme, and design style. It’s ad-supported but free. The app shows preview thumbnails before download, which saves you installing skins you won’t actually like. I’ve used it myself and found several designs I’d never have discovered through the official site. Read the permissions carefully before installing — you want a skin library, not an app that requests unnecessary device access.
YouTube Creators
The Bus Simulator Ultimate creator community on YouTube is particularly active in the Philippines, Brazil, and Turkey — the game’s biggest player bases. Creators often share download links in video descriptions for skins they’ve designed or reviewed. The advantage of YouTube is seeing the skin in motion before downloading — exterior camera, cockpit view, different lighting conditions. Search “bus simulator ultimate skin [your bus model]” and filter by upload date to find recent designs. Creators like those in the Filipino BSU community regularly share free Intercape, Victory Liner, and regional liveries that aren’t on any website.
Which Performance Upgrades Actually Matter?
Controversial opinion: most players upgrade in the wrong order. They see “engine upgrade” and immediately spend 80,000 coins on maximum engine performance, then wonder why their earnings didn’t improve. The engine matters, but it’s not the first upgrade you should buy.
Here’s my tested priority order for upgrades, based on ROI rather than the order the upgrade menu presents them:
Priority 1: Advanced Braking System
This is the upgrade that pays back fastest. The advanced braking system reduces the damage your bus takes from hard braking events — city stops, emergency brakes, unexpected traffic. Every damage event costs you in repair fees and, more importantly, drops passenger satisfaction. Passengers rate “driving comfort” as a major satisfaction factor. Smoother stops with upgraded brakes translate directly to higher satisfaction bonuses per route. Cost: roughly 25,000 to 40,000 coins depending on bus tier. Payback: within 15 to 20 routes on a high-frequency medium route like Sacramento–San Antonio. For how satisfaction scores translate into earnings per route, the routes guide has the full satisfaction bonus breakdown.
Priority 2: Tire Upgrade (Including Michelin)
The tire upgrade system in Bus Simulator Ultimate features licensed Michelin tires — a genuine brand partnership that Zuuks Games integrated specifically because Michelin is a major real-world coach tire supplier. This isn’t just cosmetic. Upgraded Michelin tires provide three measurable gameplay effects: improved handling stability on mountain routes (India, Turkey off-road sections), reduced fuel consumption on long-haul routes (the tires’ lower rolling resistance is modelled in-game), and improved wet-weather performance reducing slide and drift events in rain.
The fuel consumption improvement alone justifies the upgrade on any bus you run for more than 50 routes. On the San Francisco to New York run, the difference between stock tires and fully upgraded Michelin tires is roughly $80 to $120 in fuel cost per run — not dramatic, but across three drivers running the same route daily it compounds significantly. Upgrade tires before engine for any bus primarily used for medium and long routes.
Priority 3: GPS and Telematics System
The GPS upgrade unlocks a clearer minimap with earlier warnings for upcoming speed limit changes, intersections, and route turns. For new players this feels indulgent. For experienced players running night routes through unfamiliar cities, it’s genuinely useful. The telematics component also slightly improves how efficiently AI drivers navigate your assigned routes, reducing the satisfaction point loss that drivers accumulate from navigating without full GPS support.
Priority 4: Engine Upgrade
Engine upgrades increase top speed and acceleration. Honestly? They matter less than most players assume for profit purposes. You’re speed-limited by traffic laws throughout every route — speeding penalties destroy the satisfaction bonus faster than any speed advantage helps. Where engine upgrades genuinely help is on mountain routes (India, Turkish off-road section to Ankara) where maintaining speed on gradients without slowing below the route’s expected average reduces journey time. On flat USA highway routes, an engine upgrade has minimal practical effect. Buy it last. You can find the right bus and upgrade combinations for each route tier in the complete bus tier list.
Priority 5: Cameras and Sensors
Parking cameras and proximity sensors reduce the difficulty of precision terminal parking. If you consistently lose 100 to 200 satisfaction points per route on parking events, this upgrade directly fixes that. If you’ve already mastered terminal parking without them, skip it. The coins are better spent on braking or tires.
How Does Interior Customization Affect Passenger Satisfaction?
This section is where the game’s depth becomes genuinely interesting. Interior upgrades aren’t purely decorative — each one adds a visible amenity that passengers request and rate you on. Here’s what each does:
Wi-Fi (Highest Satisfaction Impact)
Wi-Fi is the single interior upgrade with the most consistent passenger satisfaction impact. Passengers on routes over 1,000 km actively request internet connectivity — you’ll see “I wish there was Wi-Fi” comments in your post-route ratings without it. With it installed and activated via your control panel, a consistent bonus satisfaction modifier applies throughout any route over 30 minutes. Cost: approximately 15,000 to 20,000 coins. Every bus used on medium and long routes should have Wi-Fi. Without it, you’re voluntarily giving up satisfaction score on every long run. Full details on how driver-assigned routes are affected by passenger amenities are in the driver management guide.
Air Conditioning
AC provides a moderate satisfaction boost on routes through hot-weather regions — USA summer routes, Turkey, Brazil. Less impactful than Wi-Fi numerically but still noticeable. The satisfaction tooltip shows “comfortable temperature” as a rating category on routes where temperature is a factor. If you primarily run European or Russian routes, AC is lower priority. If you run USA and Brazil routes frequently, install it before Wi-Fi.
WC Restroom
The onboard toilet is required for routes over 2 hours (in-game time — roughly 50+ minutes real time). Passengers on Vladivostok–St. Petersburg, India mega-routes, and any multi-stop USA run will request toilet access. Without it, satisfaction drops. With it installed and activated in the control panel, a steady satisfaction bonus applies on routes where WC is flagged as needed. Important: passengers still report “no toilet” complaints on some versions if the WC is installed but not activated in the control panel. It requires two steps — purchase the upgrade in Garage, then tap the WC activation icon in your driver control panel at route start. The v2.2.8 patch fixed the bug where passengers requested toilets even when WC was enabled, but the activation step is still required.
Entertainment System
On-board screens, audio system, media content. Modest satisfaction boost — noticeably lower impact than Wi-Fi or WC. Install it after the essential amenities. Think of it as the final polish upgrade rather than a priority purchase.
LED Lights
Purely cosmetic. LED interior lighting looks gorgeous in night driving cockpit view. It has zero passenger satisfaction effect — the Fandom wiki confirms this. But if you care about how your bus looks from the driver’s seat at 2am rolling into Istanbul, LED lights are a worthwhile 5,000-coin splurge.
How Do You Design a Livery That Stands Out?
Livery design in Bus Simulator Ultimate works through a template system. The game wraps a 2D image around the 3D bus model — meaning your design must account for where the image folds around door frames, wheel arches, and window panels. Here are the principles that actually produce good results:
Use High Contrast for Visibility
Your livery is most visible in two situations: from the exterior camera while driving, and in multiplayer where other players see your bus passing. High contrast designs — dark base with bright stripe, or bold solid colour with white lettering — read clearly at distance and in motion. Subtle gradient designs that look beautiful as a static thumbnail become invisible at 100 km/h. Design for motion, not for the preview screen.
Template Positioning: Where Designs Break
Every skin sits on a flat template that gets wrapped around a curved 3D shape. Elements placed near the door seams, wheel arch edges, and window cutouts will distort when applied. The community workaround: use the preview in the Garage to check your design from multiple angles before finalising. What looks perfect flat on the template can warp badly around the rear wheel arch. Leave a 10 to 15% clear margin around any door edge or window frame in your design file.
Company Logo Placement
Your company logo appears as a separate layer on top of the base skin in designated spots — front fascia, side body, and rear panel. Design your company logo in the Company section of the main menu first, then it automatically populates into the designated logo zones when you apply a skin. The most visible placement is the front fascia — that’s the panel closest to camera in multiplayer head-on views and in your route-end screenshots.
How Do You Install Custom Skins Step by Step?
There are two installation methods. The URL method is easier. The file method gives access to more designs.
Method 1: URL Import (Recommended)
- Find a skin that matches your bus model
- Tap the skin to see its detail page and copy the direct image URL
- In-game: open Garage, select your bus, tap Exterior, then tap the Custom Skin import button
- Paste the URL into the import field and confirm
- The skin loads and applies immediately — no restart required
- If the skin doesn’t appear, check that the URL ends in .png or .jpg directly — redirect URLs or landing page URLs won’t load
Method 2: File Manager Install
- Download a skin file (.png or .jpg) from a community source to your device Downloads folder
- Install a file manager app if your device doesn’t have one (Files by Google is reliable)
- In the file manager, navigate to Android > data > com.zuuks.bus.simulator.ultimate > files > Skins
- Copy your downloaded skin file into this Skins folder
- Return to the game — you may need to restart for the skin to appear in your Garage
- Select the skin from your Exterior tab custom skin list
One important warning: some Android versions (Android 11+) restrict access to the data folder. If you can’t navigate to the game’s data directory, Method 1 is your only option — which is why learning the URL method first is worth it. Never download skin files from random sites that require you to install additional apps or grant extra permissions. Stick to bussimulatorultimate.com, the Google Play Skin Bus app, and verified YouTube creator links.
What Are Michelin Tires and Are They Worth It?
The Michelin tire integration is one of Bus Simulator Ultimate’s more interesting game design decisions. Michelin is a real sponsor and brand partner — not just a texture on a wheel. The tires are modelled with three distinct gameplay properties that standard stock tires don’t have.
Handling on wet and off-road surfaces: Michelin tires visibly reduce slide events on rain-soaked roads and on the Turkish Ankara off-road section. Players who run Istanbul–Ankara frequently without Michelin tires report more steering correction inputs needed. With Michelin installed, the handling feels planted and predictable even on the gravel stretch. That off-road section is where passenger satisfaction scores can drop unexpectedly if the bus wobbles — Michelin tires reduce this effect meaningfully.
Fuel efficiency improvement: The rolling resistance model means Michelin tires consume 3 to 5% less fuel per kilometre on highway routes. That sounds minor. On a 4,100 km San Francisco to New York run with fuel costs around $1,000 base, 3 to 5% is $30 to $50 per run. With three driver-assigned buses running daily, that’s $90 to $150 saved every day passively. The tires cost roughly 35,000 coins per bus. They pay for themselves within two to three weeks of consistent play.
Cosmetic appearance: Michelin tires render with the real Michelin branding visible on close-up exterior camera. For players who care about authenticity — particularly those building realistic national bus company fleets — the branded tires complete the visual presentation. Pair them with a realistic livery and the bus genuinely looks like something you’d photograph at a real coach terminal.
Worth it? For any bus you run more than 30 routes — absolutely yes. For a bus you’re still testing or likely to sell, skip them until you commit to keeping the vehicle long-term.
Frequently Asked Questions About Bus Simulator Ultimate Customization
Does customization affect earnings in Bus Simulator Ultimate?
Directly: no — a better-looking bus doesn’t earn more coins by default. Indirectly: yes, and significantly. Interior amenities (Wi-Fi, AC, WC) improve passenger satisfaction scores, which increases your post-route bonus multiplier. Performance upgrades (braking system, Michelin tires) reduce damage events and fuel costs per run. A fully upgraded bus with all passenger amenities installed earns noticeably more per route than the same bus with no upgrades — not because of visual changes, but because every satisfaction modifier compounds into the bonus payout. For the full breakdown of how satisfaction percentages translate to coin earnings, see the money-making guide.
Why can’t I see my downloaded skin in the Garage?
Three likely causes. First: the skin file format is wrong — BSU requires .png or .jpg specifically, not .webp or .gif even if they display correctly on your phone. Second: you placed the file in the wrong directory — it must be in the Skins subfolder of the game’s data directory, not the Downloads folder. Third: the game needs a restart after file placement — skins installed via file manager don’t auto-detect. Force-close the game fully, reopen, navigate to Garage and check the custom skin section again. If using URL import and the skin still won’t load, verify the URL leads directly to an image file rather than a webpage.
Are there free premium skins in Bus Simulator Ultimate?
Yes — two routes to free premium-quality skins. First: earn gold coins through daily logins, gift boxes, and objectives, then use gold to unlock DLC skin packs from the in-game store without spending real money. The daily login Day 7 bonus (10 gold) plus regular gift box accumulation means a patient player can unlock gold-tier skins free within two to three weeks. Second: the community skin library at bussimulatorultimate.com has designs that are visually comparable or superior to paid DLC, completely free. Many are based on real bus operators and look indistinguishable from official content.
What skin format does Bus Simulator Ultimate use?
The game accepts .png and .jpg image files. PNG is preferred because it supports transparency, allowing skin designs to leave certain areas of the bus body showing the underlying paint colour rather than a forced white fill. JPG is acceptable but can produce visible compression artefacts on large flat areas of solid colour — which looks particularly bad on clean white or black sections of a livery. If you’re creating your own skin using a design tool, always export as PNG at 2048×512 resolution minimum for the best texture quality without excessive file size.
Can I create my own custom livery design?
Yes. The skin template files are available from the https://getbusimultimateapk.com/ community pages for each bus model. Download the template, open it in any image editor (Adobe Photoshop, Canva with custom dimensions, or the free app Autodesk Sketchbook), design on top of the template layer, export as PNG, and install via the file manager method above. The template shows bus panel boundaries, door seam positions, and window cutout locations so you can design around the 3D wrap distortion points. First-time designers: start with a single-colour base plus one stripe. Learn where the template maps to the 3D model before attempting complex multi-element designs.
Do Michelin tires work differently from standard tires?
Yes — three measurable differences. Better wet and off-road handling (visibly reduces slide events on Istanbul–Ankara off-road section and rain routes). Lower fuel consumption (approximately 3 to 5% per kilometre — meaningful over long routes with multiple driver-assigned buses). And Michelin branding rendered on the exterior close-up view for authenticity. The tires cost approximately 35,000 coins per bus. They pay back through fuel savings within two to three weeks of regular play on any bus running medium to long routes. Upgrade these after the braking system but before the engine for most buses.
Does the company logo appear on my bus automatically?
Your company logo applies to designated zones on any skin you use — front fascia, main body side panels, and rear. But it only pulls from whatever you’ve set in Company settings. If your company logo is the default placeholder, that’s what appears on your bus. Design your company identity first — name, colour scheme, logo icon — in Company settings before applying skins. Your logo also appears above your bus in multiplayer mode, which means it’s visible to other players during Ultimate League races. It’s worth investing 20 minutes in a distinctive company identity early. Players with recognisable branding get noticed in multiplayer.
Is Wi-Fi worth installing on every bus?
On any bus running routes over 1,000 km: absolutely yes, install it immediately. On short routes under 500 km (Istanbul–Ankara, São Paulo–Rio, Berlin–Munich): the satisfaction benefit is minimal because the route completes before passengers have time to engage with Wi-Fi. For your AI driver-assigned buses on medium routes, Wi-Fi is especially valuable because drivers already earn 60 to 70% of your personal satisfaction score — every fixed bonus modifier from amenities directly improves their earnings too.
Can other players see my custom skin in multiplayer?
Yes — your livery and company branding are visible to other players in Ultimate League and standard multiplayer sessions. Community skins installed via URL or file method render correctly for you but may show as a default skin to other players depending on their game version and whether the skin is hosted on a publicly accessible URL. DLC skins purchased through the in-game store are fully visible to all players. If standing out in multiplayer matters to you, a combination of a distinctive livery design plus your company logo on the front fascia creates the strongest visual identity.
Make Your Fleet Yours
That 45-minute livery session I described at the start — deep red Setra, white diagonal, company logo on the front — didn’t directly earn me more coins. But it changed how I thought about the game. I wasn’t just grinding routes anymore. I was running a company with a visual identity, buses I’d built to my preferences, interiors fitted for long-haul passenger comfort. The game shifted from a coin-accumulation exercise to something with a bit more character.
That’s the customisation system’s real purpose. The performance upgrades justify themselves financially. The passenger amenities improve your earnings. But the paint, the skins, the liveries — they’re about making the grind feel personal. And in a game you might play hundreds of hours, that matters more than any spreadsheet can measure.
My prediction: Zuuks Games will keep expanding the skin DLC catalogue and community sharing tools in future updates. The community around skin design — especially in the Philippines and Brazil — is too active and too talented for the developers to ignore. Expect more official bus operator liveries and possibly a proper in-game livery editor within the next major version cycle.
One thing I’m curious about: what was the first custom skin or upgrade that made your bus feel truly yours? Was it a livery design you made yourself, a community skin you found, or a performance upgrade that changed how a specific route handled? Drop it in the comments — I’d genuinely like to know.
For the buses worth investing in before you start upgrading them, the complete bus tier list has everything you need. For routes worth running with a fully upgraded bus, the routes guide has the profit data. And if you want every skin, upgrade, and bus unlocked from the very beginning, the MOD APK skips the grind entirely.
